


















Configuration Reference
Settings
| Prompt | RichText | What the agent should do. Type / and select a property to pull a column into the prompt |
| Expected Outputs | MultipleValues | Define each field you want back. They must match what the prompt asks for |
| Advanced Settings | Checkbox | Reveals the model and max iterations controls |
| LLM Model | Text | Which model to run, from OpenAI, Google, and others. Defaults to GPT 4o-mini |
| Max iterations | Number | How many steps the agent may take per row, where a step is a search or a page visit. Defaults to 7, maximum 15. More steps costs more |
| Website Scraper Option: Render HTML | Checkbox | Render the page in a headless browser first, for JavaScript-rendered sites. Costs 2 credits per scrape. Off by default |
Inputs
| Prompt | Text | What you want the agent to do, in plain English. Type / to insert a column |
| Variables | Varies | The columns you insert into the prompt with /. Each one becomes its own input |
Outputs
| Your Expected Outputs | Varies | Every field you defined in the settings, written into its own column |
| Confidence Score | Number | How sure the agent is about the row, from 0 to 100. Higher is better |
| Error Msg | Text | The agent's error message, when a row failed |
Step-by-Step Guide
Step 1: Sign Up & Upload Your Data
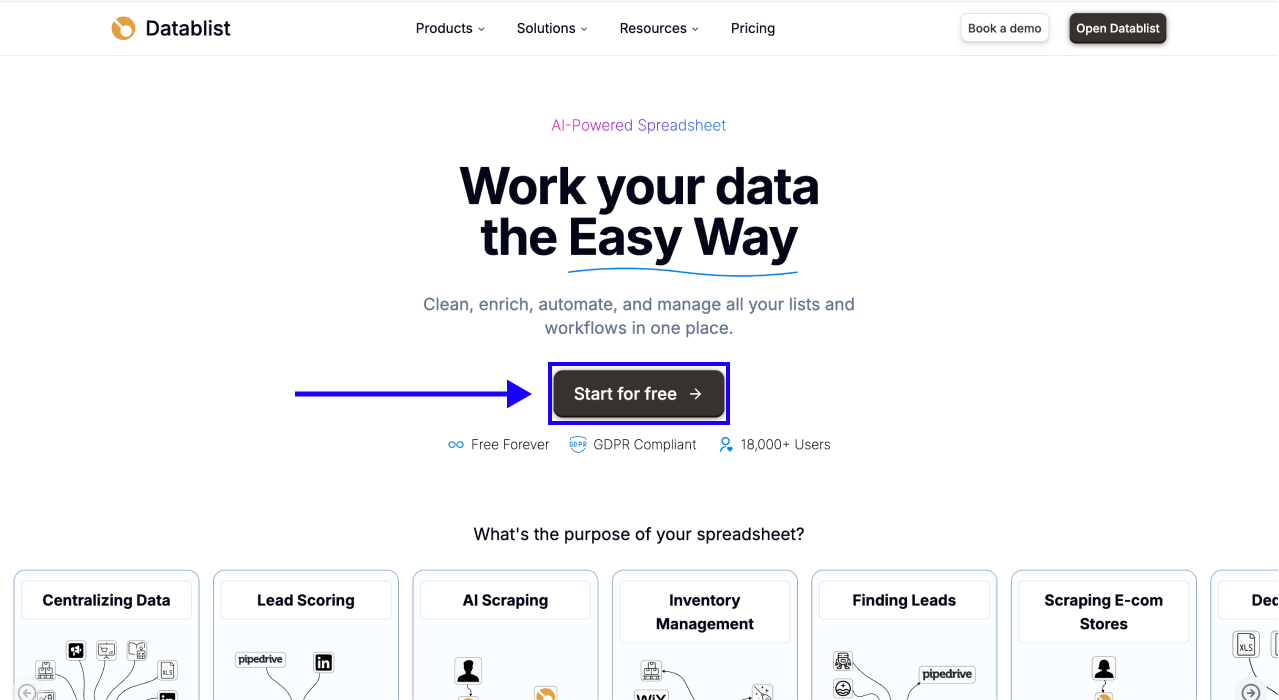
First, Sign up for Datablist.com
Then, Upload your CSV or Excel file containing your company names and website URLs
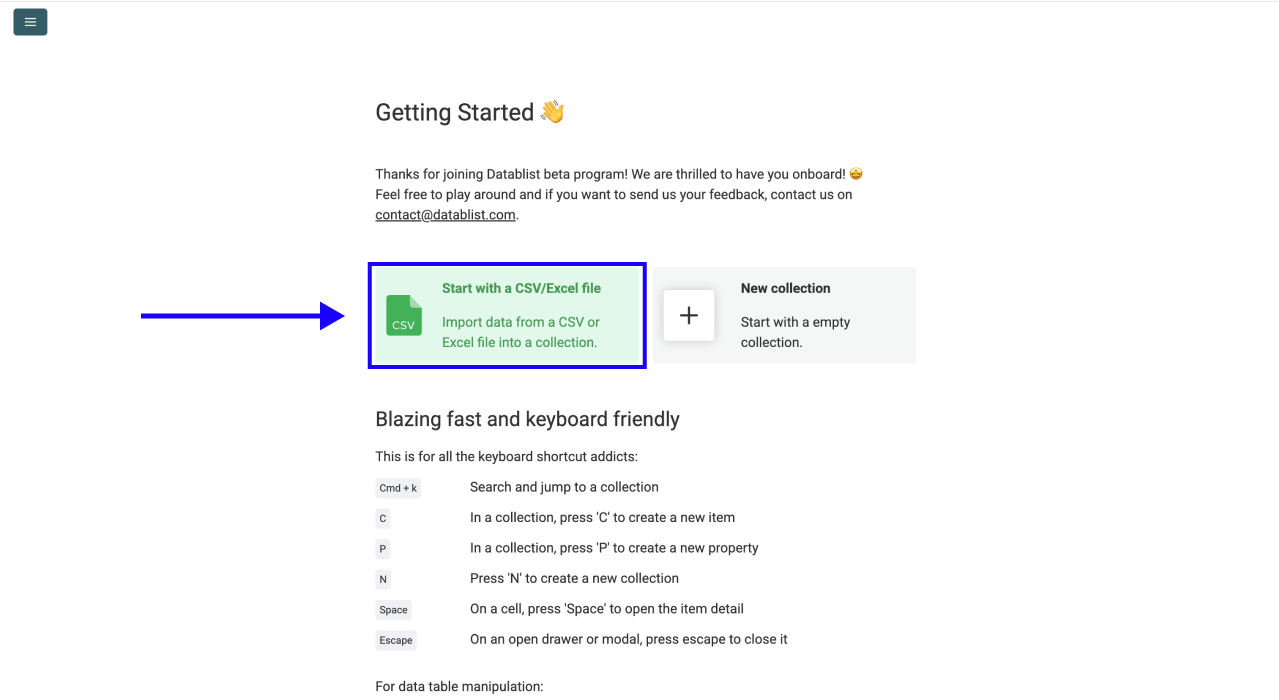
Give the agent whatever context you have. It makes a real difference to the results.
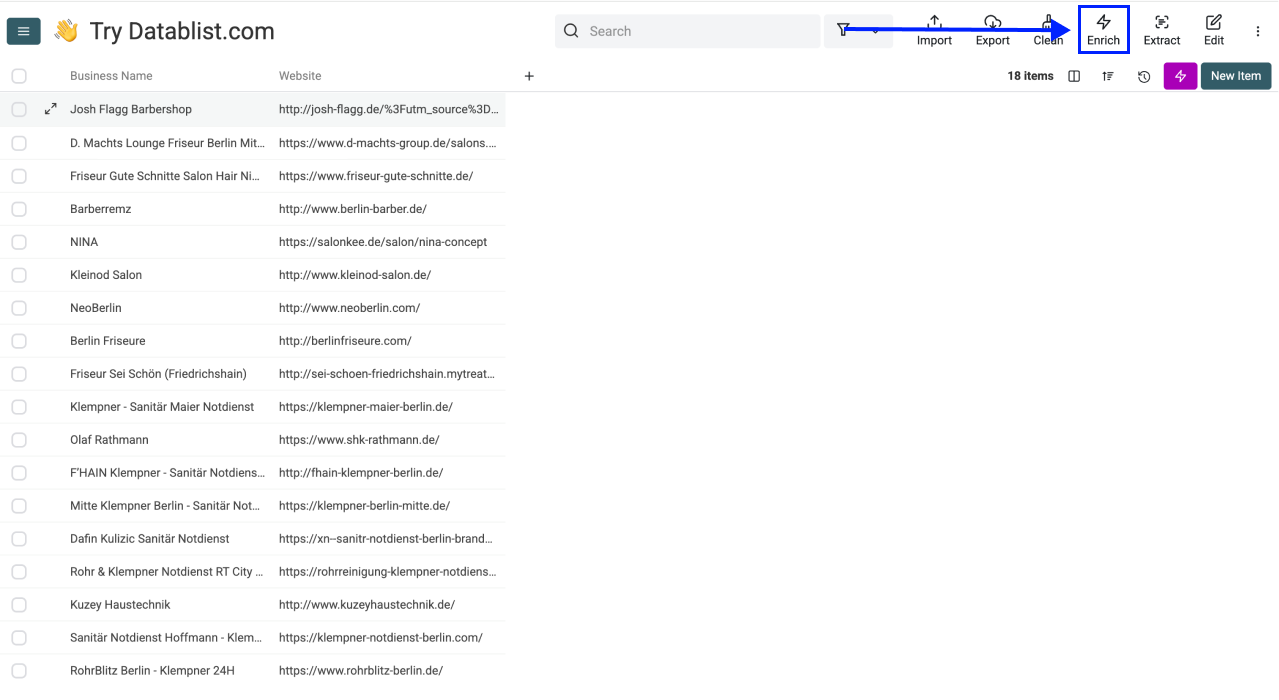
Step 2: Navigate to the Enrichment
1. Click on Enrich in the top menu
2. Go to the AI tab
3. Select AI Agent
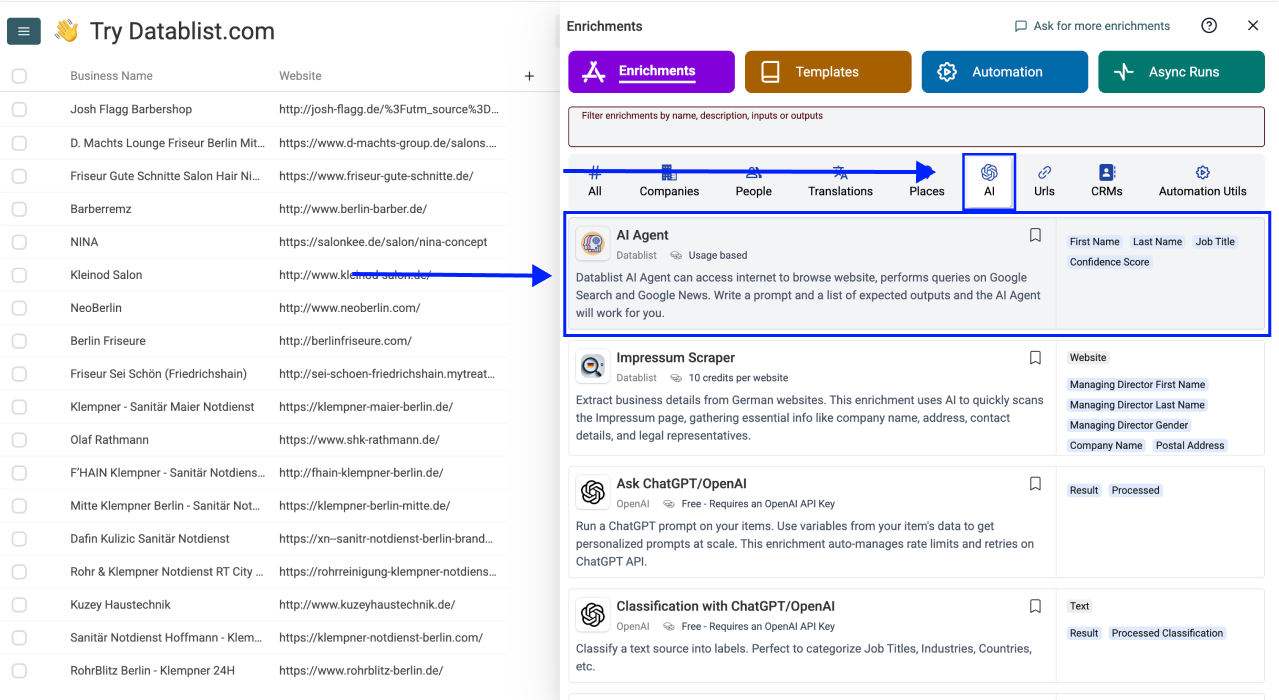
Step 3: Select a Template, or Write Your Own Prompt
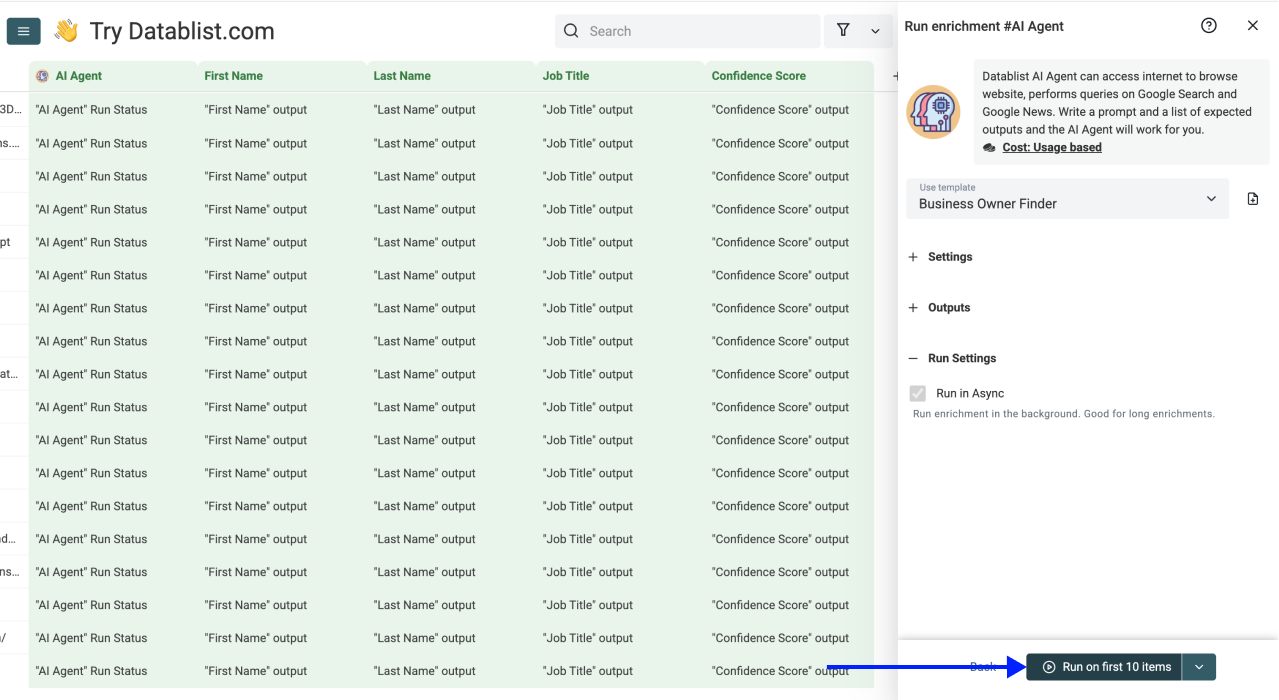
Click on the Template Drop-Down and select a ready-made template, for example "Business Owner Finder".
You don't have to write a single prompt. The template is ready to use out of the box. Just select it, put your variable in, and Datablist handles the rest. If you ever want to customize what the AI looks for, you can edit the template in plain English.
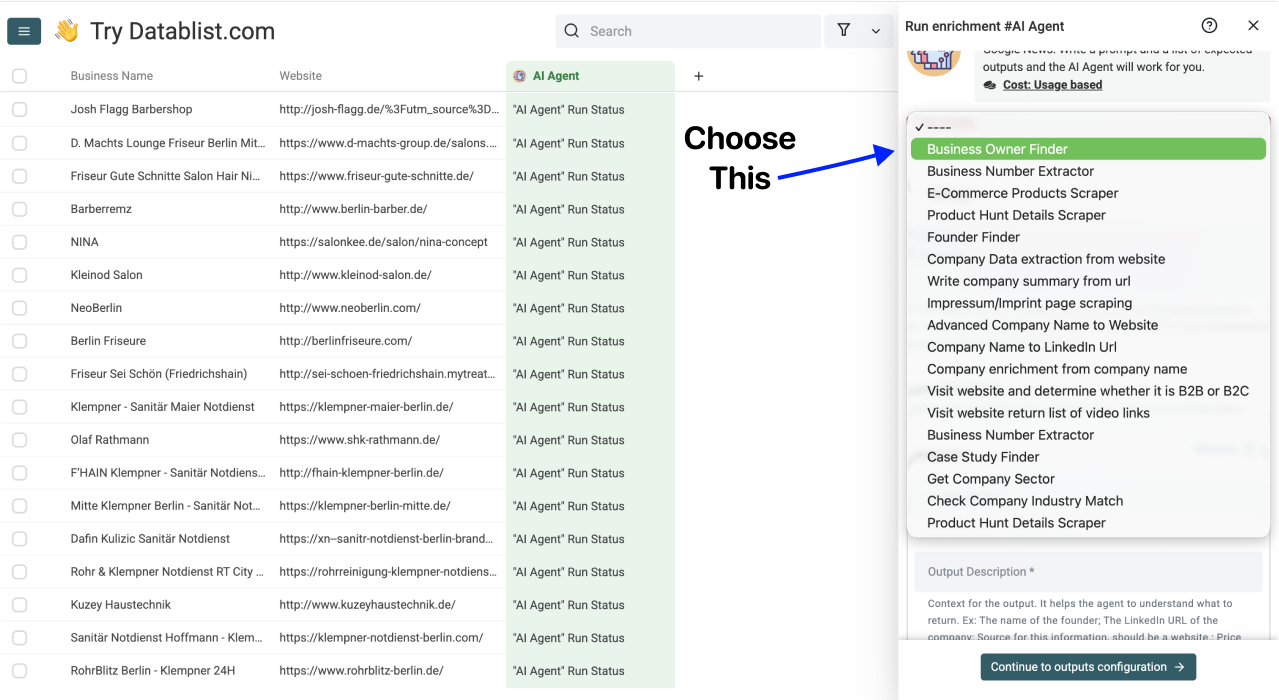
To write your own instead, keep it concrete and pull your columns in by typing / and selecting the property:
• Visit /Website and find the name and title of the Head of Marketing
• Analyze /Website. Does this company sell to businesses or consumers?
• Find the Impressum page on /Website and extract the Managing Director's name
Step 4: Map Your Input Property
Scroll down and insert the website URL as your Input Property. You can do this by typing / and selecting the column that contains your website URLs.
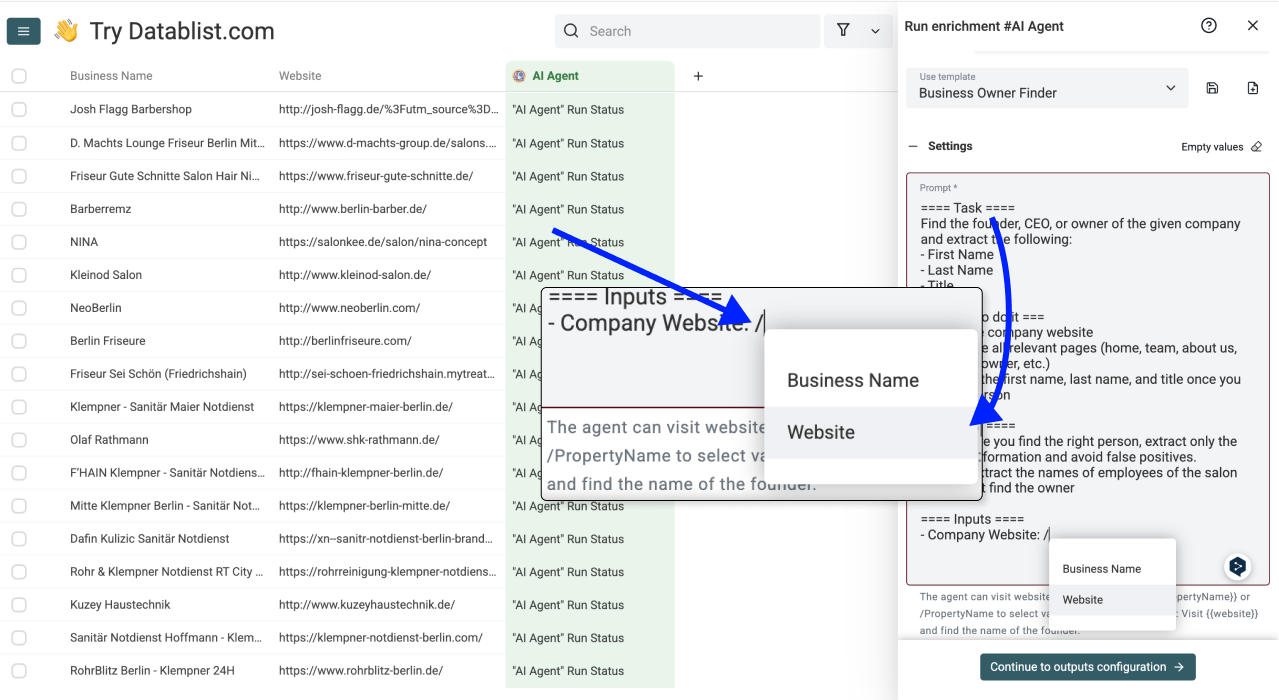
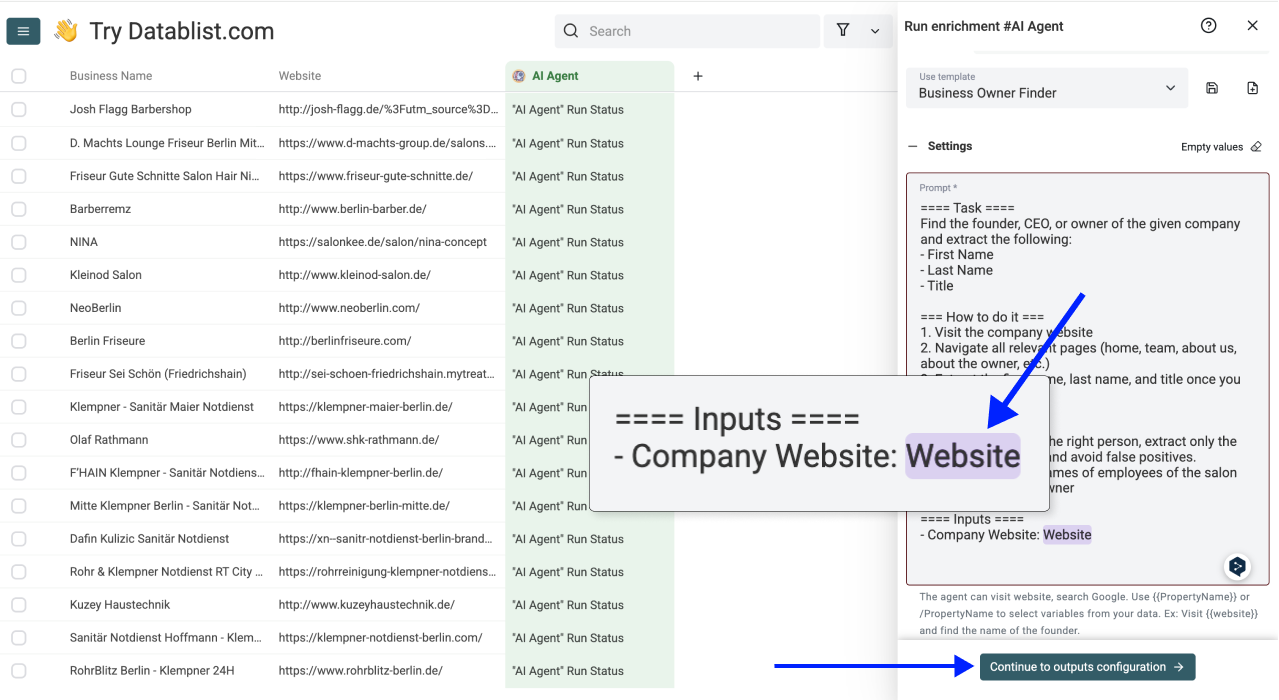
Once the variable appears in purple, click on Continue to outputs configuration
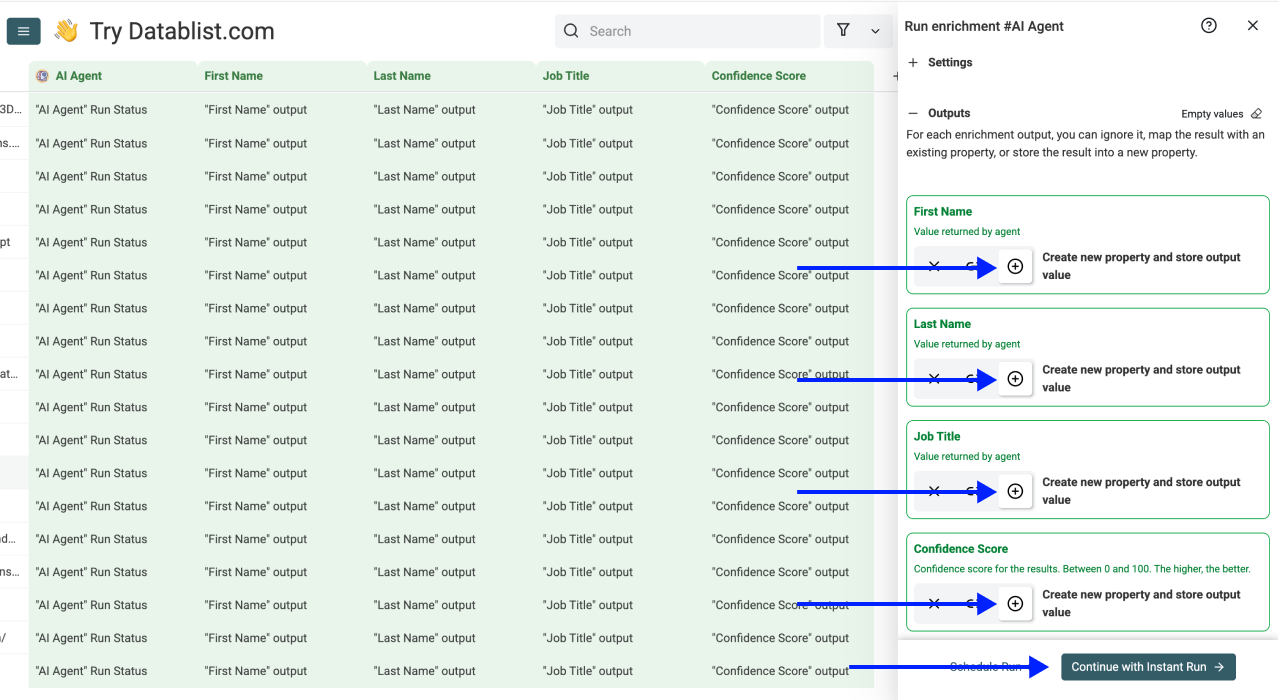
Step 5: Select Outputs
Name every field you want back, one per output. The Business Owner Finder template, for example, returns:
• First Name: The business owner's first name
• Last Name: The business owner's last name
• Job Title: Their role at the company
Keep your outputs narrow. A field like Owner Name is far more reliable than a field like Details, and an output the prompt never asks for comes back empty.
Add Confidence Score and Error Msg too. They are what let you triage a large run afterwards. Click the icons to add them to your collection, then click Instant Run
Step 6: Run the Enrichment
Open Advanced Settings before a large run. Max iterations caps how many steps the agent may take on a single row, which is your main control over cost. The default of 7 suits most tasks. If your target sites render through JavaScript, enable Render HTML, which adds 2 credits per scrape.
Configure your run settings by clicking on the chevron on the right side of the button:
• Run on first 10 items: Good for checking results before committing
• Run on first 100 items: Useful for validating larger samples
• Run on first {X} items: Choose exactly how many to process
• Run on all view items: Process your entire list (or view if you've enabled filters)
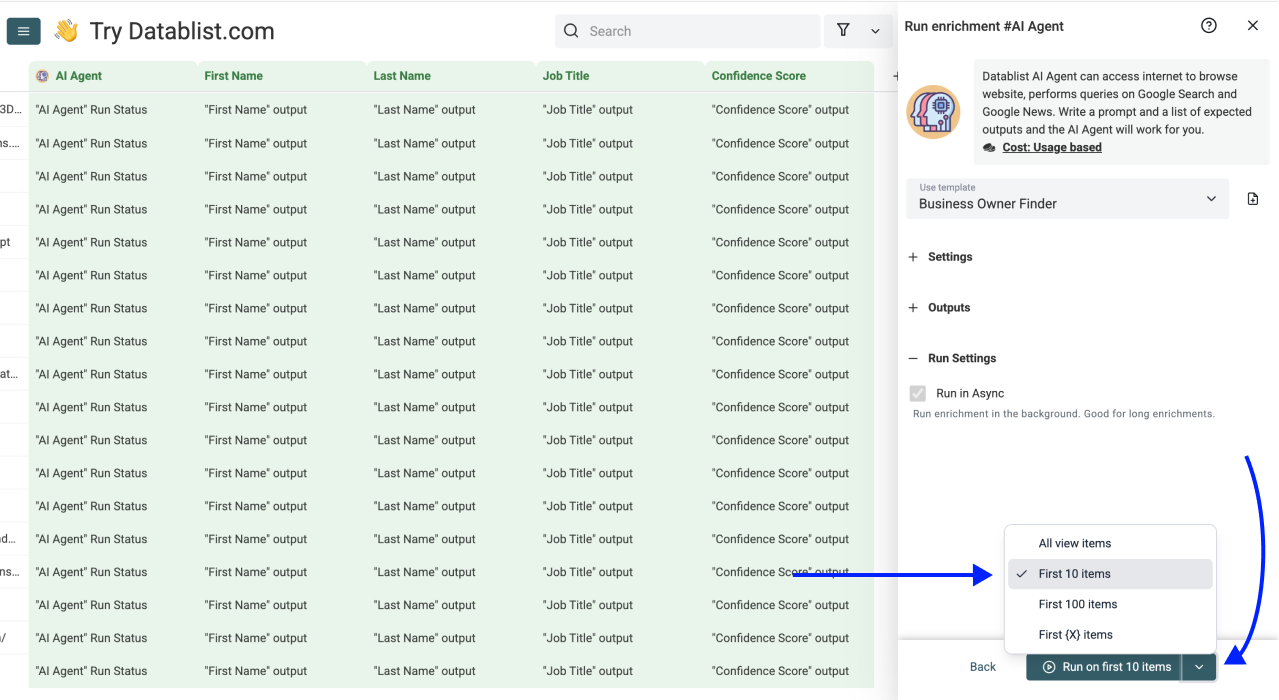
Once you have chosen your preferred option, click Run on X items
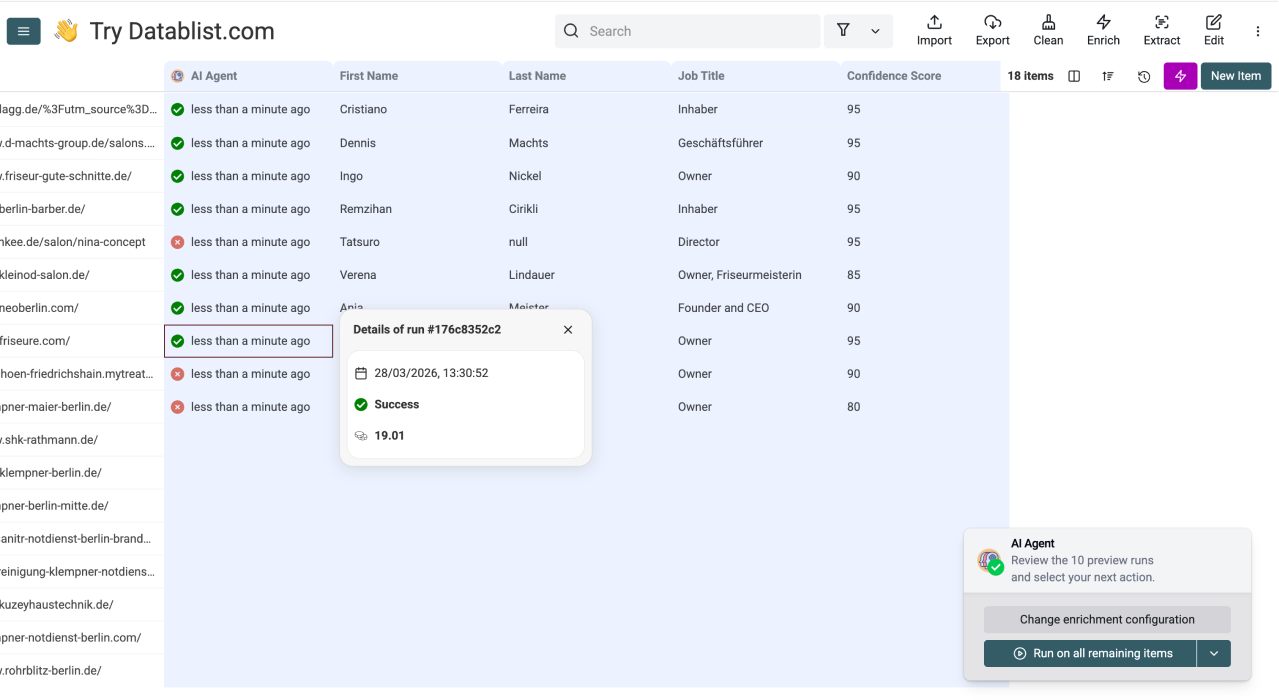
Within minutes, the fields you asked for are populated in your collection. Read your real per-row credit cost off that first sample before scaling up.
Stop Doing Manually
What Datablist Can Do in Seconds
Give Datablist a try and see how easy workflow automation can be.
38,000+ users are already experiencing it!
